Documents and photos can be uploaded against sites, jobs, assets, and resources. In addition, you can create document tags to help categorise and organise documents.
The Documents page displays a list of documents available. You can upload documents in this area by selecting Upload and then select the file you wish to upload:
When uploading a new document to the system you can set an expiry date and set email notifications to be sent to a Team or a specific User or Resource.
The List can also be filtered using the below filters.
Selecting the three dots beside the Upload button will display additional options:
- Document Tags – This will reveal a pop up where you can create tags.
- Excel Export – This will allow you to export the documents list to an Excel sheet.
- View Archive – This will display all documents that have been archived.
- When viewing the archived documents, the above option changes to “View Live” which will show all live documents.
To archive a document, select the following icon for the document you wish to archive:

The first icon allows you to download the file, the second icon allows you to send the file vie email, and the third icon will allow you edit the file name and description. The magnifying glass icon allows you to preview the image / signature.
If the file is a PDF document, when you click the magnifying glass icon you will be brought to the PDF Preview pop-up where you can view, download or print the document.
You can also add tags to documents in order to help categorise them further by selecting this icon under the Tags column:
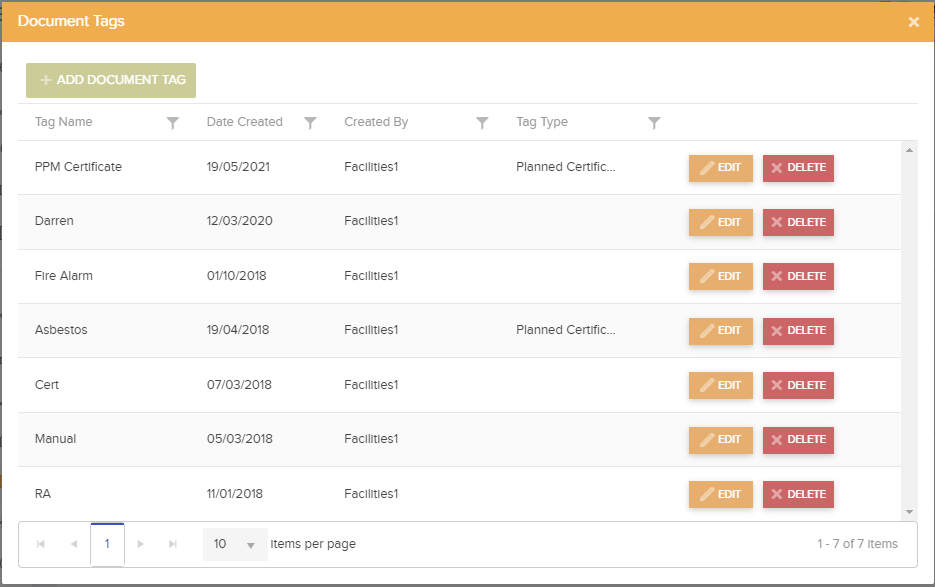
Selecting this will display a pop-up window with a list of all current document tags. From here you can select an existing tag, or create a new tag by selecting the Add Document Tag button. Clicking this will create a new row in the list allowing you to name the new tag. You can also edit or delete tags from this window:
Document Tags and PPM Certificates – This can be enabled so that a Planned Job cannot be completed by the Contractor until a document is uploaded with the Tag ‘PPM Cert’ attached to it.
- In the document manager click on ‘Document Tags’ and create a new tag – example PPM Cert and set the Tag Type to Planned Certificate.
2. When creating or updating a Planned Schedule we now have a new setting ‘Planned Certificate must be uploaded before completion’ This can be set to ensure that a document with tag type Planned Certificate is attached to the planned jobs from the schedule before completing them.
3. This can also be set up, if you require a Report for reactive Jobs also. For each Resource/Contractor there is a setting – ‘Resource Report Required for Reactive Jobs’ .
You can attach the document to certain Jobs and / or Sites by selecting the following icon, which can be found under the Job No. or Site columns:

This will load the jobs / sites available and you can select the appropriate job / site. This will then be displayed on the Documents list.
You have the option to change the status of the document to Public or Private and can toggle between the two by selecting change on the document you wish to modify:


