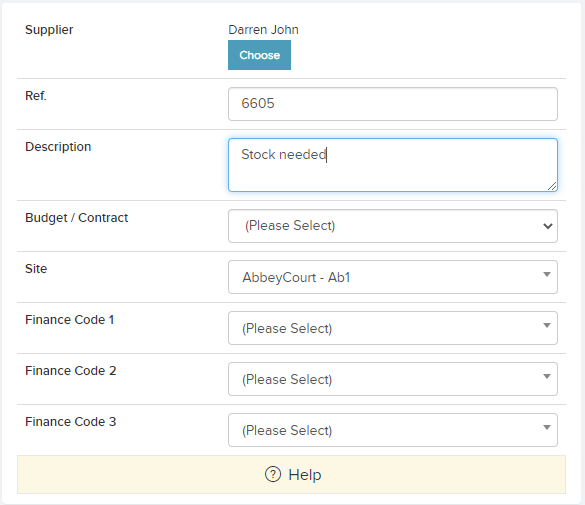
Purchase orders can be created against a Job or stand alone.
You can create a PO from the ‘Purchase Order’ tab on the Job Details page or in the Finance Area.
Purchase Orders / Material Requests displays all purchase orders created. You can select each PO Number which brings you to the PO / Material Request Details view. In this page, you have a table labelled Purchase Order Items where you can add, update and delete purchase order items:
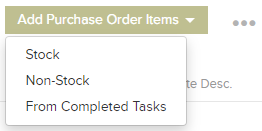
From here you have 3 different options:
Stock – A pop up will appear with a list of all stock items for you to add to the Purchase order.
Non-Stock – A pop up will appear with 3 fields to fill out, Quantity, Cost and Description. Click Save to add this Non-Stock item to the Purchase order.
From Completed Tasks – A pop up will appear with a list of Costs from Completed Job Tasks for that Resource for you to add to the Purchase order.
From the Purchase Order Items list the Storage Area can be changed, The Tax rate can be changed and this grid can be exported to Excel.
Once PO items are added you can ‘Send for Confirmation’ . In Settings -> Purchase Order Settings you can set up Confirmation Bands to restrict certain users from confirming PO’s.
Clicking ‘Send for Confirmation’ will reveal a pop-up where you can send an email to everyone or send to a specific person. A link can be attached to this email that will bring the user (once logged in) directly to that PO. At this point a PDF will be generated.

Once the PO is Confirmed you can then send that PO via email to the Resource/Supplier.
Fufill should be selected when the stock arrives and this will be the status of the PO in the PO list. The stock ordered is now brought into a storage area or asset.
You can also ‘Flag as Invoiced’ . You will get the option to add an invoice number now and this will change the status to ‘Invoiced’ on the main PO list.
_______________________________________________________________________________
When creating a PO from a Job you will get the option to ‘Instruct Job and Send PO to Resource’ . This will appear when:
- The PO is not at status fulfilled
- The job is Pending (or not instructed or complete)
- There is a single resource already selected for the job which matches the resource for the PO.
As soon as the button is clicked it will generate the PO PDF and attach it to the job (as well as the PO). It will then bring up the instruct wizard as if you were instructing the Job to the Resource. Once the instruct wizard has been completed then it will change the PO status to “Confirmed” (if it is not confirmed already).


