The Costs tab of the Job Details page allows you to view, create, and update costs directly against jobs and job tasks:

The Costs tab in the job details displays the Job Costs for that job. The job costs can also be seen across all jobs from the Finance -> Job Costs area.
From these two areas you can view, edit and add costs.
Also from the Contractor Portal, a resource (contractor / engineer) can view, edit and add their costs against each instructed job task in very similar screens. And a resource can also edit job task costs from the Resource App.
As soon as a job is instructed to a resource, a job task is created and an empty cost row associated to that job task is also created. This can then be edited.
You can also add new cost rows against a job as well from the Add Cost button.
Each cost item has the option to View and Edit at the start of each job cost row.
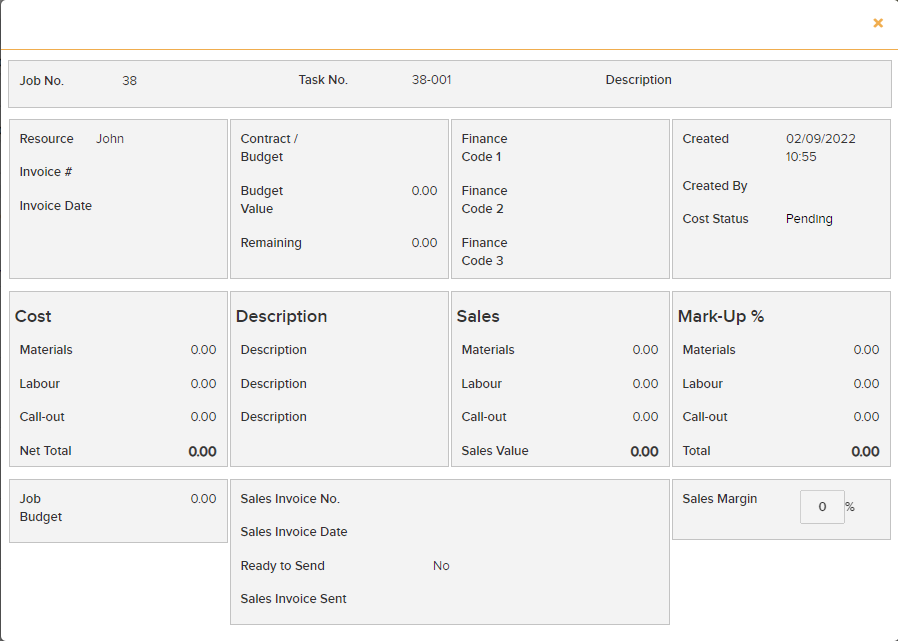
View displays a pop-up with the job cost details:
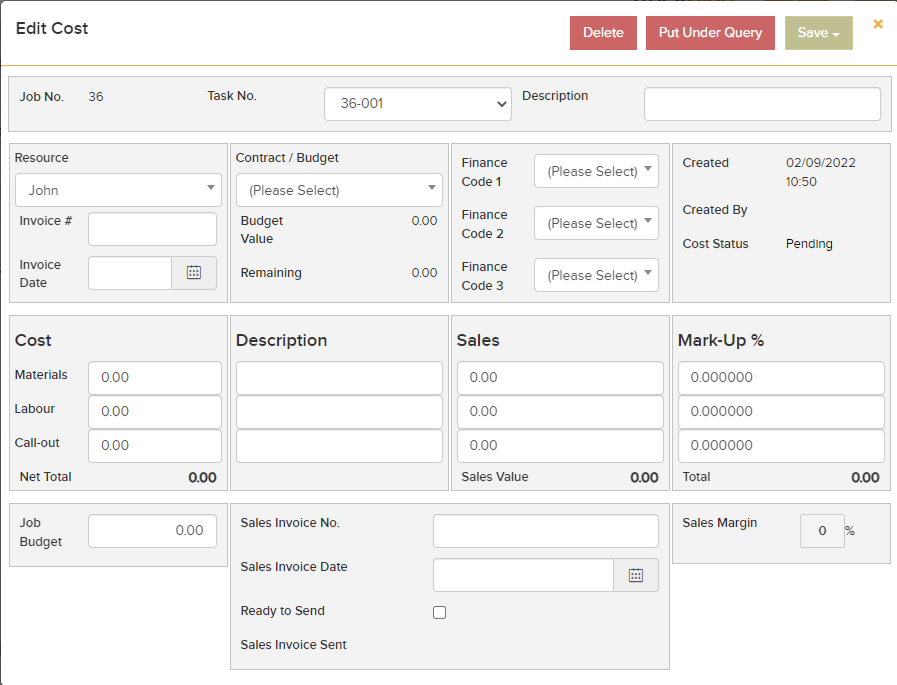
Edit allows you to change the cost information. The Edit pop-up allows for the following options:
- Delete – this will delete the cost information associated with the job.
- Put Under Query – this indicates that the costs need to be analysed and this will be the status of the cost information for that particular job.
- Save – will offer two options: Save and Save as Invoiced.
- Save – this will save all the changes made to the costing of the job and leave the cost status as is.
- Save as invoiced – this will save all changes made and change the cost status to Invoiced. In order to make any changes to the costs after it has been Saved as Invoiced, you will need to ReOpen the cost. This will reverse the Cost Status from Invoiced to Pending. The Reopen button will appear where the Edit button was previously.
Add Cost at the top-right of the page allows you to add a new cost row to the job. From the Finance -> Job costs area you will be asked to select a job first:
This will then display a pop-up for you to populate with the new cost information. This will be identical to the edit cost screen above. Note: For jobs that have been broken down into job tasks you can also select the job task you wish to add this cost to.
Selecting the three dots option in the top right corner also gives you the following additional options:
- Audit Trail – will display a pop-up of Audit Trail of Cost Changes. This list can be sorted by selecting the various column headings in order to view, or can be exported to Excel.
- Excel Export – allows you to export the Job Costs list to an Excel spreadsheet.
Costs Finalised
Once a contractor is happy that their costs are complete, then in the Contractor Portal they can click on the Costs Finalised button . This will appear at the top of the Job Costs tab or on the Task Detail Page once that task is complete.
The Costs Finalised button will also appear at the top of the Task Details page in the main application.
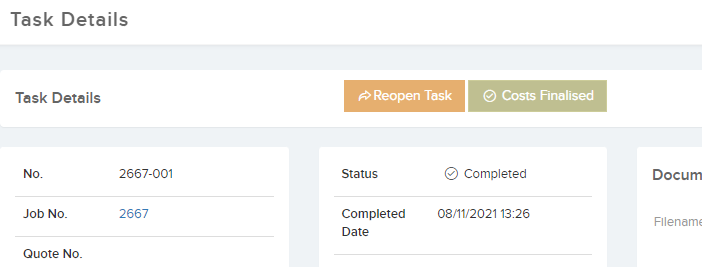
This will change the cost status to “Costs Finalised”. It will also set the task status to Complete – Costs Finalised and change the job sub-status to Costs Finalised.
It is a good way for the central team to know when the costs are ready from the Contractor’s perspective.
Invoice Received
The ‘Invoiced Received’ button will appear on the cost list on each cost row under the Cost Status, if the Job Status is at ‘Complete’ and if the Job cost status is ‘Invoiced’ or ‘Costs Finalised’. This is optional but is a good way for the Finance department to indicate that an invoice has been received from the contractor.
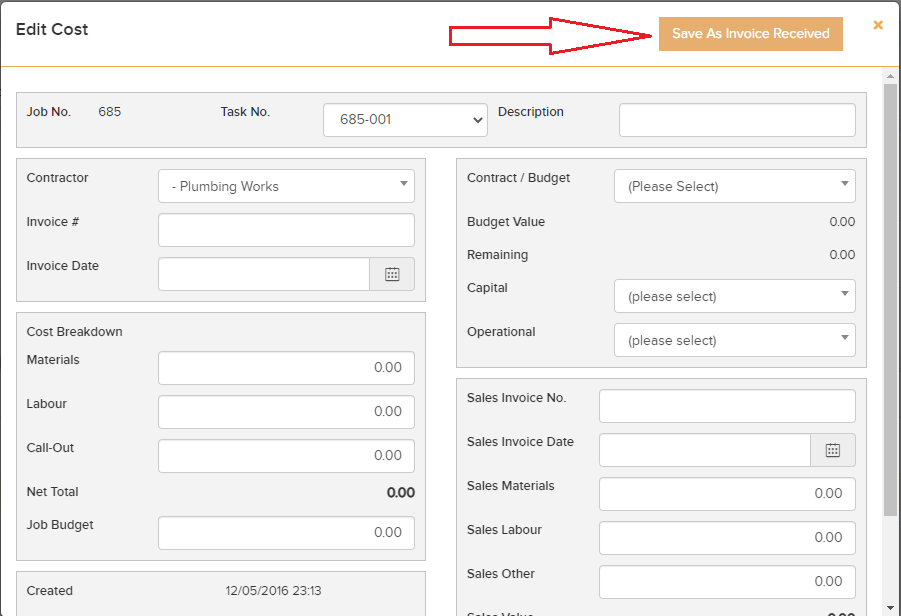
Clicking this button will reveal a pop-up where you can click ‘Save as Invoiced Received’ – This will change the Cost status to ‘Invoiced Received’
Sales Values on Cost Page.
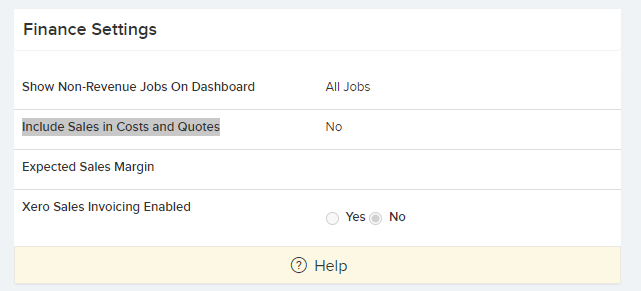
By default you enter the costs for each job and task. But you can also enter the sales value corresponding to each cost. This is relevant for organisations who want to charge for work done to other departments or their clients. You can see in the screenshot how the sales values appear. This can be enabled from Settings -> Job Settings -> Finance Settings by checking the option Include Sales in Costs and Quotes.
Overview of Cost Statuses and cost workflow
Pending – When a cost is added, either from the Add Cost button, or from a job being instructed to a resource, the new cost status will be “Pending”. Also when a cost is “Reopened” it will set the status to pending.
Invoiced – If a cost is Save as Invoiced on the edit cost screen from the main application or the contractor portal, then the cost status will be set to Invoiced. At this point it cannot be edited, but it can be reopened and then edited.
Under Query – When the “Put under Query” button is clicked on the edit cost screen. “Save as Invoiced” button removes this and changes the status to “Invoiced”.
Costs Finalised – When the Cost Finalised button is clicked on the contractor portal, or from the task details page in the main application.
Invoice Received – When the Invoice Received button is clicked on the cost list in the job costs tab under the job, or in Finances -> Job Costs. Note this button does not appear to contractors in the Contractor Portal.
From Quote Approval – If contractor quote has been submitted and approved, then the cost row status will be changed to From Quote Approval. And the quote values will be brought into the cost row.
Note that some of these buttons and statuses are optional and it is up to you how you want to work with them. You can enter job costs and always keep them on the Pending status for example.

